Friday, January 19, 2007

Styrofoam Print


Project/Activity: Styrofoam Print

Age Level: Any--although a lot of adult help is advisable for K-3

Materials: Styrofoam (flat sheets, at least 4x6"), Smooth white paper (preferably not construction) washable printers' ink, brayer, pans for ink, mirrors.

Procedure:
1. Introduce the idea of creating a print. For younger students, show several examples of stamps. Ask the students to explain how using a stamp works. Explain that a print is a much larger version of a stamp. Specifically point out stamps of words. Why are the words backwards on the stamp? For older students, introduce the idea of a woodcut. Show examples of prints. Some great examples of classical woodcuts can be found at http://oldmasterprint.com. More child-accessible woodcuts can be found in the children's' books, Whaling Days by Carol Carrick and My Son John by Jim Aylesworth.
2. Using a very dull pencil and pressing very hard, have the students draw their image on the Styrofoam. Images will print backwards from the cut stamp. To ensure that students are drawing the opposite of what they really want to see, have mirrors available for them to check their work in.
3. Using the brayer, spread ink on the Styrofoam master.
4. Quickly press the master onto a piece of paper. Separate the master from the print. If desired, the master may be washed and used with a different colored ink.
5. Have a large flat area set aside for drying the prints. When the image has dried, have students complete their work by matting it or gluing it on a piece of colored paper.


Teaching tips:
Especially if the Styrofoam pieces are small, this activity goes very quickly. It is advisable to have more than one sheet for each student so that those who finish first will be able to work on another one.
Even older students need a lot of help understanding directionality and negative space. Which way will the print face? What parts will be dark or light when printed.
It is important to find inks that really are washable. For younger classes, have the adults do the actual stamping.

Below is an example of a sheet of Styrofoam incised with a design, ready for printing. At the top of the page is an example of a print made with a similar Styrofoam sheet.

Tuesday, January 16, 2007

Cut Shapes Collage


Project/Activity: Cut Shapes Collage

Age Level: 6 and up (or able to handle scissors well)

Materials: Construction paper (many colors), glue, scissors

Procedure:
1. Review the concept of "collage". What is a collage? What are different things that could be used to make one? It is helpful to have a variety of examples of student collages, if available.
2. Using colored paper, have the students cut the appropriate shapes for their collage. Tell them not to draw the shapes first. This will add an element of spontaneity to the finished product.
3. Glue the shapes on a background paper.

Optional Activities :
1. For younger students (or students who have difficulties with scissors), the same activity may be done using torn elements. If the collage is torn, all pieces should be torn.

Teaching tips:
The theme that I've used most with this project is "All About Me", but other themes may be used. As a lighter art project, It can double as a beginning of the year get-to-know-you activity.

At the top of the page is an example of a cut paper collage in the "All About Me" theme.

Monday, January 15, 2007

Think Outside the Page


Project/Activity: Think Outside the Page

Age Level: 8 and up--but may be adjusted for younger students (see Optional Activities)

Materials: White paper (four 4"x6" papers for each student and one 8"x10" per child)

The Big Idea: When students first begin to draw, they tend to center small subjects in the middle of the page with not much connection to the edges of the paper. Most children do not even realize that it is OK for pictures to go to the very edge of the page and even beyond. When objects or shapes seem to escape the boundaries of the picture or seem to move beyond the frame line, the eye is led out of the picture, giving the illusion of greater dimension or space.

Procedure:
1. Show students several prints that display shapes and objects successfully going beyond the edge of the paper. Some great examples of this are Absinthe by Degas, Dempsey and Firpo by Bellows, and Seven A.M. by Hopper. Talk about what happened to the missing parts of shapes and why we can still tell what the original objects are.
2. Discuss some of the reasons artists use this concept. Talk about how cutting off an object might NOT work--for instance, placing a head at the bottom of a picture with the body missing.
3. Explain the "Rule of Three". In art, if a picture goes outside the border at all, it must go out on at least three sides so as not to look lopsided.
4. On the 4x6 papers, have the students do quick practice sketches in which parts are cut off by the edge of the picture.
5. Using one of their sketches as a sloppy copy, have the students create a finished, colored picture utilizing this technique.

Optional Activities :
1. This lesson may be simplified for younger students. Skip the practice sketches and have the students make a cut-and-paste collage, extending their pasting beyond the border of the page so that things "hang off" the paper. Then cut or mat the picture to the original size.

Teaching tips:
It helps when setting students loose to do their quick sketches to have some kind of open-ended theme to get them started. This can actually be a great tie-in to other curriculum. If learning about space, have them draw scenes from outer space. If studying the rain-forest, use a jungle theme.

At the top of the page is an example of a finished drawing utilizing the concept.

Sunday, January 14, 2007

Creativity Exercise--This Line is A...


Project/Activity: This Line is A...

Age Level: Any

Materials: Several copied sheets of the line paper (see picture below), your medium of choice (crayons, colored pencils, markers, pastels, paints)

Procedure:
1. Introduce students to the line paper. Turn the paper every direction and have the students brainstorm ideas of what the line could be made into. What does the shape remind them of? How could it become a part of something else? How does it change when viewed from another direction? If available, show students several examples of other students work.
2. Give each student a copy of the line page and instruct them to fill the entire paper with their picture, incorporating the line as central part of the design.

Optional Activities:
1. Using their very best handwriting, have students write "This line is a __________". For older students, encourage them to use descriptive words about their subject.

2. This activity may also be done with any random line or shape. Another similar activity that I frequently use is "transforming scissors". For this, I give students a black and white copy of a basic outline of a pair of scissors and instruct them to transform it into a picture of their own.

Teaching tips:
It is important to encourage students in this activity to look beyond their initial ideas and the example pictures. Make it a challenge to do something completely new with the line. With older students, integrate this into their grading. Before I started really stressing the importance of originality, I would end up with 10-15 near duplicates of the example pictures!--Not quite what I was going for with the activity.

Below are some pictures of the original sheets given to the children and examples of a completed scissor sheet. See the top of the page for an example of the completed line project.


Saturday, January 13, 2007

Crayon Doodles


Age Level: Any

Materials: White paper (any size), markers, crayons

Procedure:
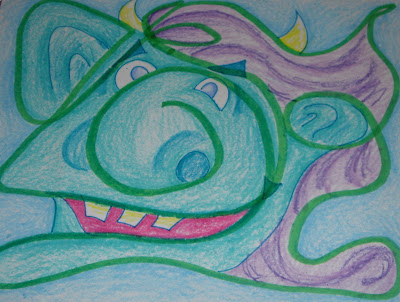
1. Give each student one marker. Without lifting their marker, have the students draw a long doodle line. It can angular or curvy, but advise the students to try and use the whole piece of paper. With younger students, it helps to give a time limit (like 30 seconds) for this doodle.
2. Have the students exchange the paper with another student. It helps to have a set rotation--everyone handing to the left, or across the table, etc.
3. Using the doodle they were given, tell the student to create a picture from the line. This should be done in crayon, so the original marker line still shows through.
4. Have students finish their picture by coloring it all in, encouraging them to fill the entire paper.

Notes on Teaching:
With younger children (ages 3-9) it's important to let them know before they begin the project that they will be switching doodle papers with someone else to finish. I learned this the hard way when I had a first grader VERY attached to his doodle and not willing to give it up. This also creates social pressure for those students less interested to concentrate and do a good job because someone else will get their paper. It can be a fun twist to give the doodles a "theme". My personal favorite is "Monster Doodles"--having the students try to find and create monsters from their doodle. Other good themes are "Animals", "Plants" and "Faces".

For very Small Groups:
This project can actually be successfully done with just one child. Simply do a doodle yourself and trade. It also adjusts well to a "quiet" activity for situations where long periods of quiet sitting are needed. --Who says you shouldn't doodle in church?!